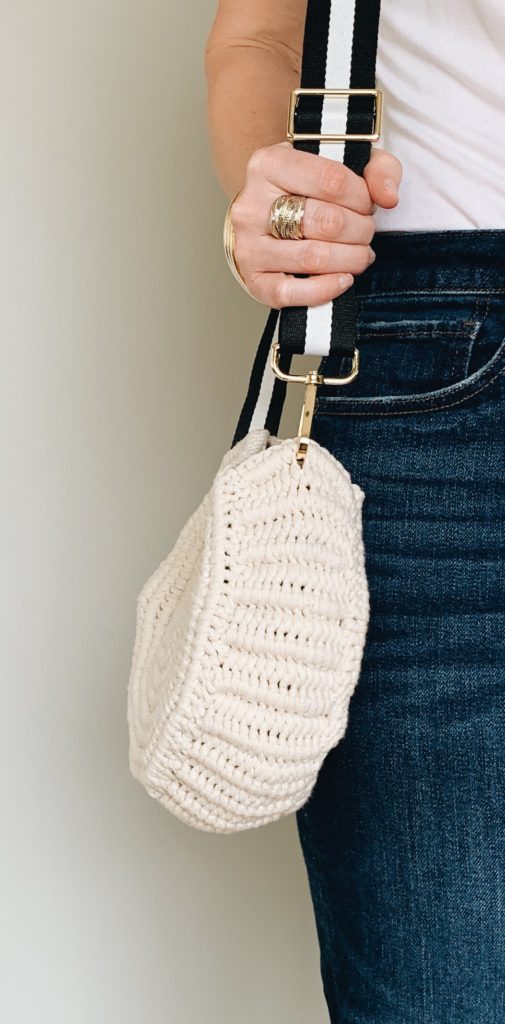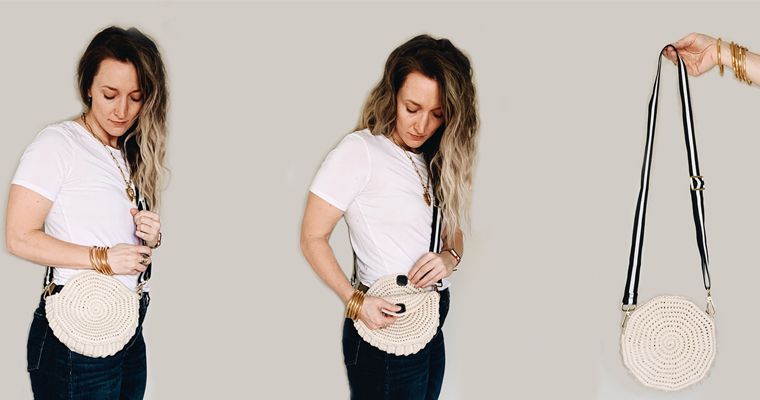
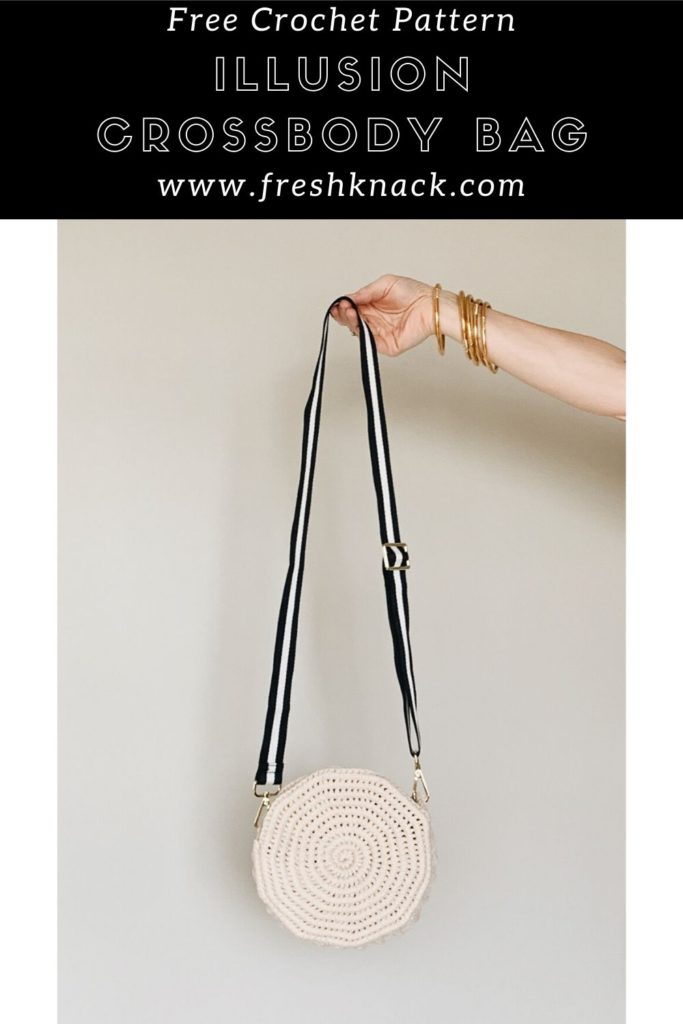
An easy summer crochet bag – The Illusion Crossbody Bag is a free pattern here on the blog. The cotton cord helps to give the bag shape and structure. Read through my inspiration, design process, and what yarn I chose along with substitutions or scroll on down for the free pattern to get your summer bag ready for the summer season!
The Design Process
Inspiration
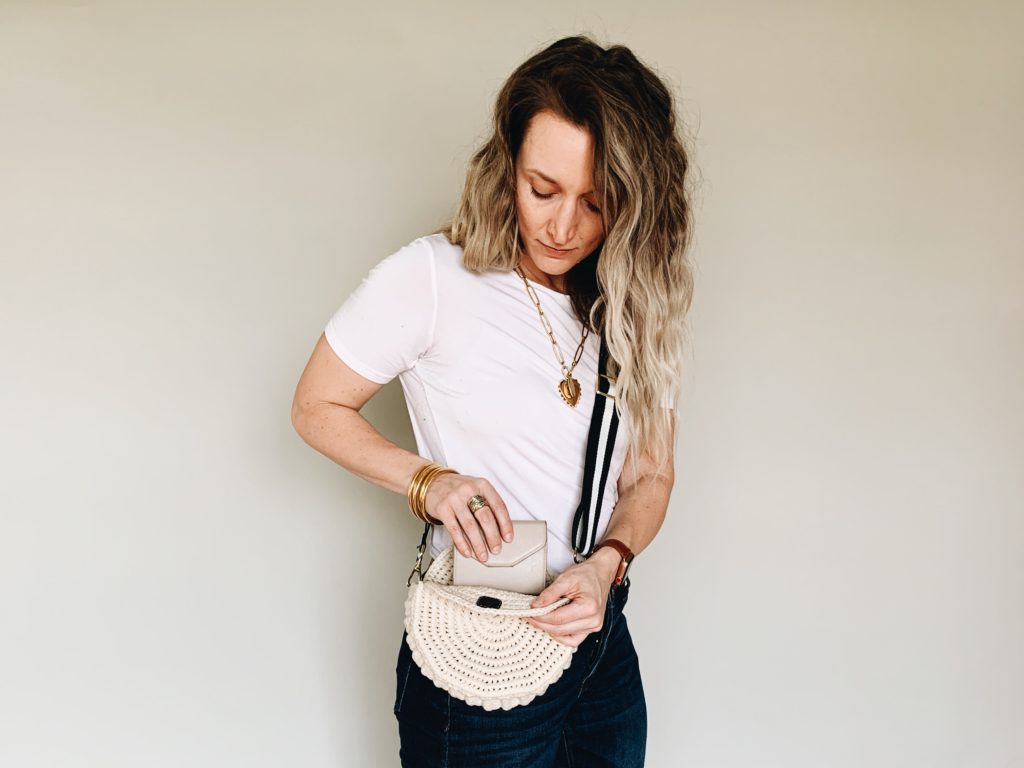
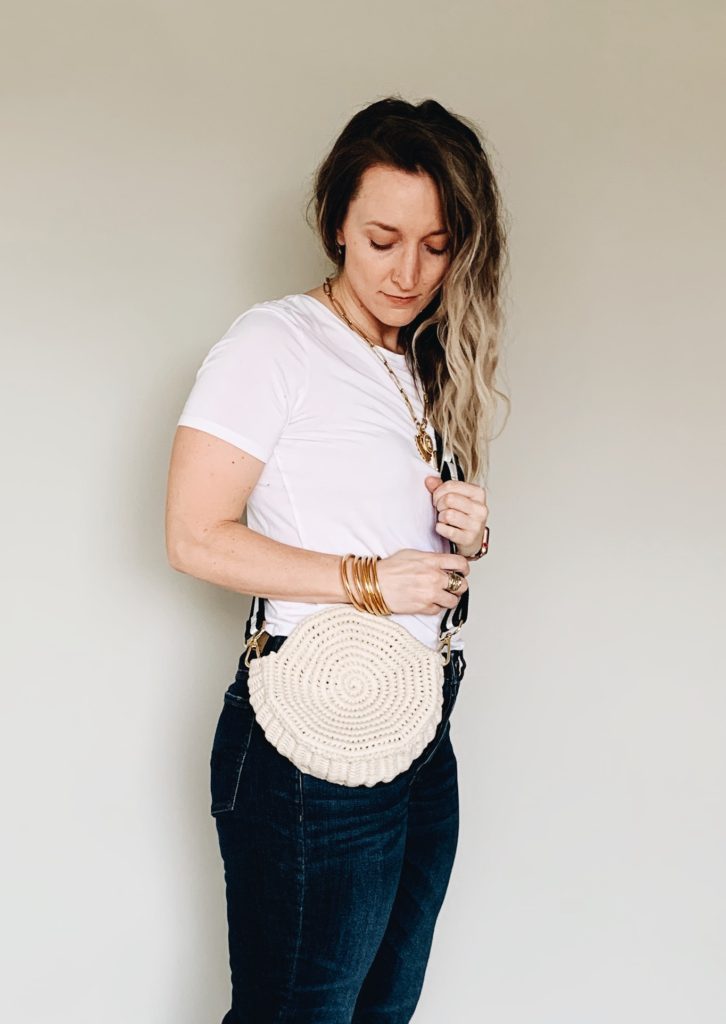
I have always wanted a “summer bag” to use for those vacations and date nights out with my husband when I don’t need to carry all the things for my kids. I love this bag for a couple reasons, it is small and lightweight. Also the strap is interchangeable, so you can swap out the the strap inexpensively if you want to go for a different look.
A lot of the time while on vacation I will just take a clutch with me with my essentials and not fuss over a purse. However, I am sooooo paranoid that I will leave my clutch on the table and forget all about it. I mean who wants to eat their dinner with a strap around their wrist to ensure they don’t forget it?
The Yarn
I have always been a fan of the Bernat Maker Home Dec yarn for a few reasons. It is extremely versatile and great to work with. I have heard rumors that they aren’t selling it anymore which may make it hard to find but a couple other alternatives that I think may work are Lion Brand’s Rewind yarn or Hoooked Zpagetti. Just check your gauge before beginning.
Customize your size
This bag can be customized by making it smaller or larger pretty easily. You can either stop sooner to make it smaller or keep going to make it larger. I wanted it just big enough to fit my phone and wallet along with a couple other items but not much more. I typically carry a pretty large purse all the time to carry stuff for my kids and of course a WIP.
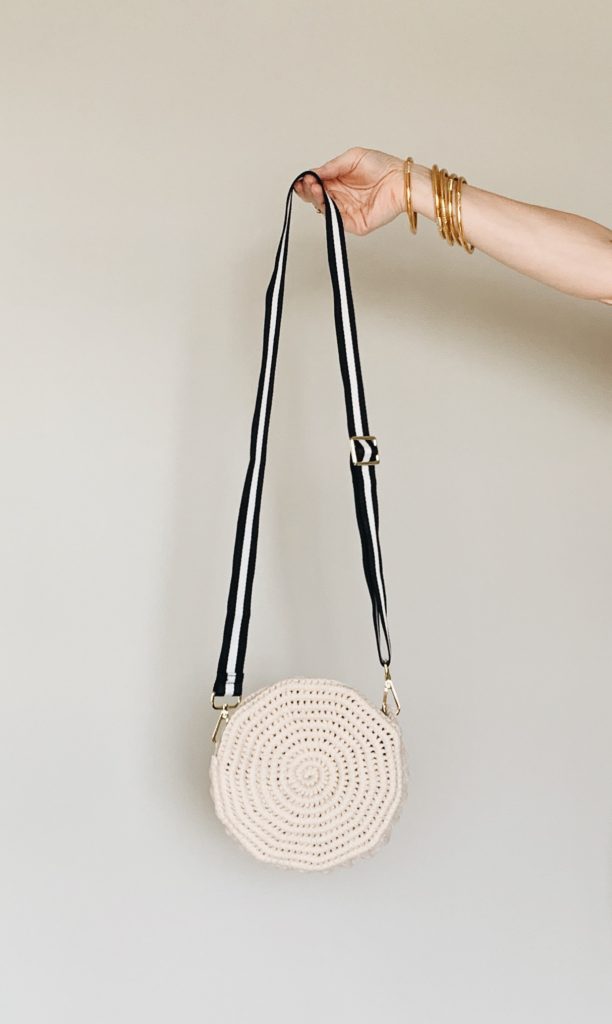
Pick your strap!
I didn’t want to make a strap for this bag as I wanted to customize it a bit to my taste. So I found this strap on Amazon and there are a plethora to choose from if you search bag straps. You can choose different designs for different seasons or events that you may take this bag with you.
Pattern
- Find the ad-free printer friendly PDF version HERE
- Add the pattern to your Ravelry queue HERE
- Go ahead and Pin it for later HERE
Materials
- Rope 38′ or 3.52oz
- 7mm crochet hook
- Bernat Maker Home Dec color Cream – 174yds or 4.84 oz (unfortunately this yarn is unavailable from several retailers so read here for my substitution recommendations)
- Scissors
- Needle
- Hot Glue Gun
- Purse Strap
- Stitch Markers
- Magnetic Closure or this one
Gauge/Dimensions
- Front/Back
Gauge: 5 rounds, 50sts measured top to bottom is approx 4″
Finished Dimensions: 8 3/8″ at the widest point (side to side), 8 1/8″ at the narrowest point (top to bottom) - Side/Bottom
Gauge: 14sts x 9 rows = 3 1/8″ x 4″
Finished Dimensions: 16 3/16″ long 3 1/8″ wide
Notes
This pattern is worked by crocheting around rope in a continuous circle, no joining rounds. Use a stitch marker to keep track of the beginning of each round.You need to continue to pull your rope throughout to get your stitches to come together and less of the rope being exposed. It is recommended to hot glue at the end so that the stitches won’t fall off the rope on the ends.
Illusion Crossbody Bag
Make 2 (Front and Back)
Set up: Create slip knot and place on hook, placing rope on top of your working yarn, yarn over and pull through loop on hook pull tight.
Round 1: Sc 10 times around rope. *Reminder: slide down your stitches so that they are closer together here and throughout* <10 sts>
Round 2: Starting in the 1st sc from round 1 and curling your rope around 2sc in each st. <20sts>
Round 3: *sc, 2sc in next st*, repeat from *to*. <30sts>
Round 4: *sc in the next 2 sts, 2sc in next st*, repeat from *to*. <40sts>
Round 5: *sc in the next 3 sts, 2sc in next st*, repeat from *to*. <50sts>
Round 6: *sc in the next 4 sts, 2sc in next st*, repeat from *to*. <60sts>
Round 7: *sc in the next 5 sts, 2sc in next st*, repeat from *to*. <70sts>
Round 8: *sc in the next 6 sts, 2sc in next st*, repeat from *to*. <80sts>
Round 9: *sc in the next 7 sts, 2sc in next st*, repeat from *to*. <90sts>
Round 10: *sc in the next 8 sts, 2sc in next st*, repeat from *to*. <100sts>
Tie off and weave in ends.
Make 1 Bottom and Sides
Set up: Create slip knot and place on hook, placing rope on top of your working yarn, yarn over and pull through loop on hook pull tight.
Row 1: Sc 14 sts around rope, ch1, turn
Row 2: While still crocheting around rope sc in all sts, ch1, turn <14sts>
Row3-37: Repeat row 2
Tie off and weave in ends.
Assembly
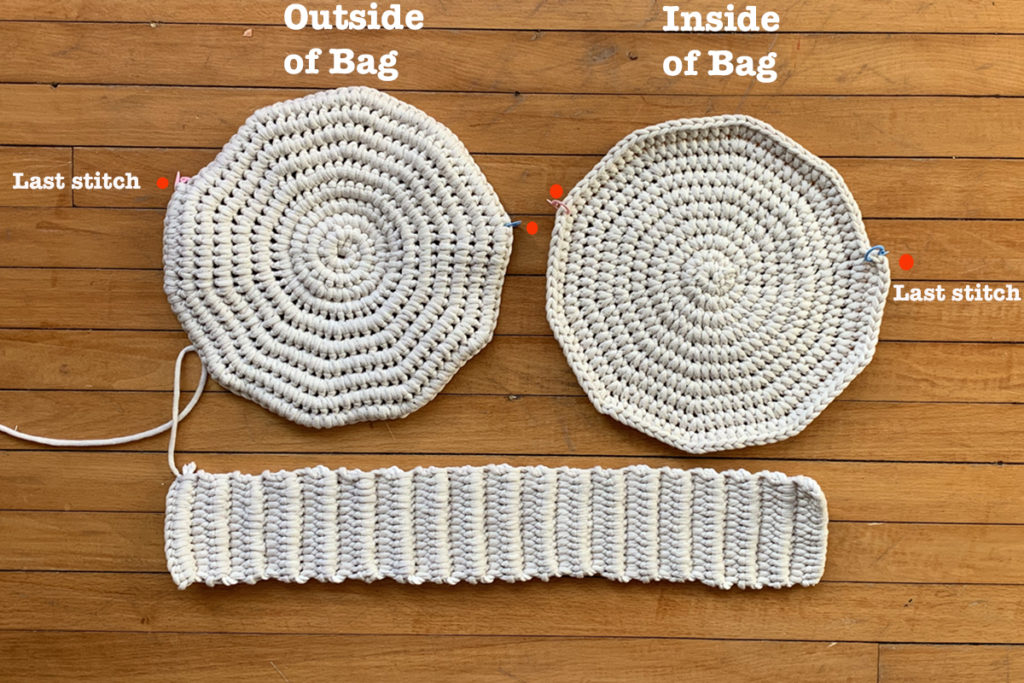
I would highly recommend to hot glue your ends (yarn and rope) so that your yarn does not slip off your rope. The glue dries clear so you won’t notice. Lying your pieces together as pictured below, place your stitch markers at your last stitch and stitch 40. These are the beginning and end points where you will attach your side/bottom of your bag. Also note that when you construct the bag your last stitch on each piece of the front/back will be on opposite sides. You can see the stitch definition difference from the outside of the bag to the inside.
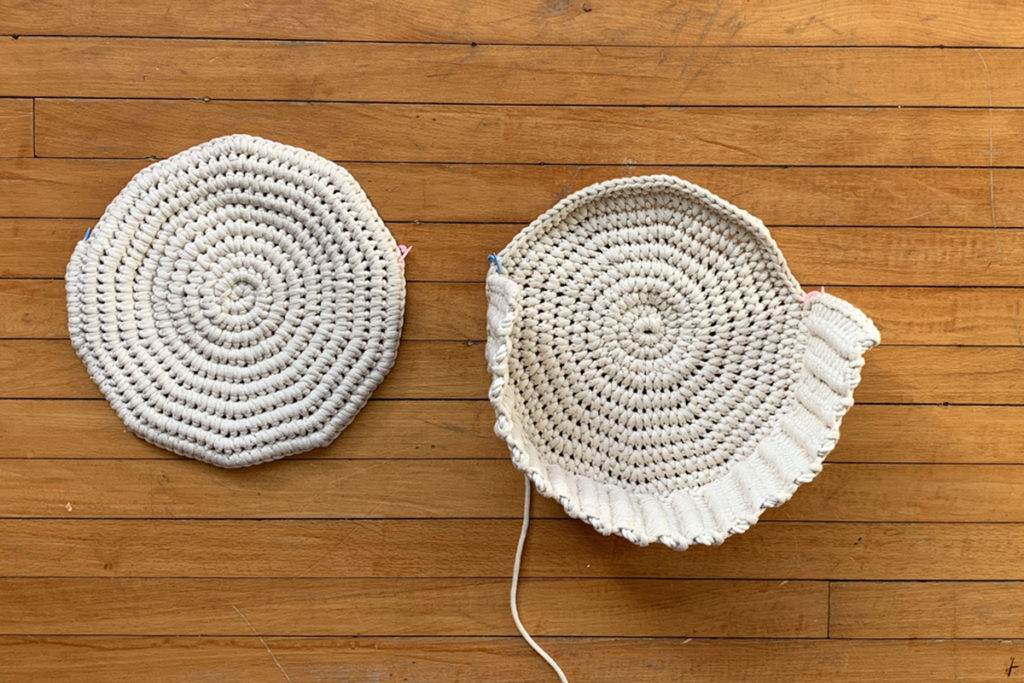
You will evenly distribute your side/bottom from stitch 40 to stitch 100 as marked with your stitch markers, whip stitch it to your front/back piece. When finished it should look similar to below. Now you will repeat that process with your remaining piece.
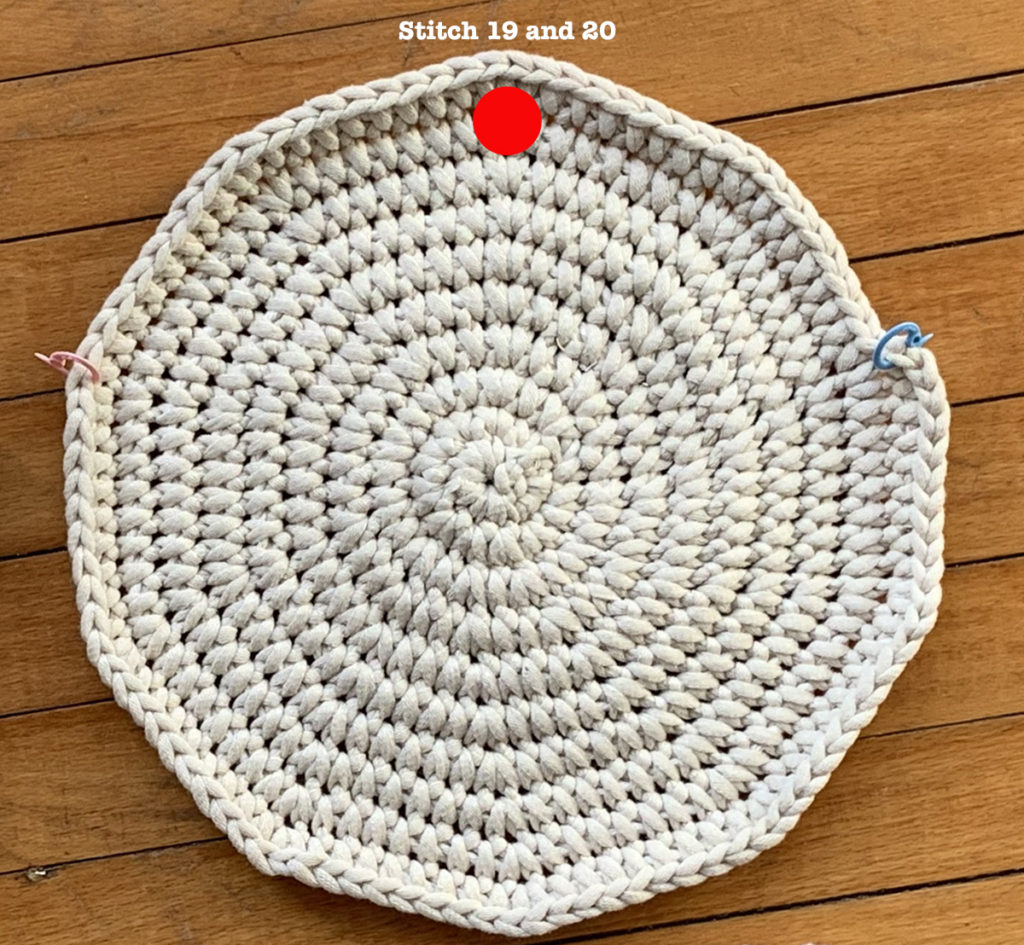
Now if you choose to have a magnetic closure you will want to line it up at around stitch 19 and 20 at the top of your bag. I used this one and I will admit it was a pain to stitch on. The outside is plastic and I basically had to pre-poke holes before I could sew it on. Since I didn’t have the patience to wait for another one I went with it but I might have gone with this one instead.
I sewed mine on after I was completely done with my bag but it really doesn’t matter when you do it.
Now all you have to do is attach the strap to your first and last row of your sides and you are ready to head on out with your cute new bag!